
Halloween is just around the corner, and it’s the perfect time to embrace the spooky spirit by getting crafty with your kids. Whether you have little ones or teenagers, these Halloween-themed DIY projects are perfect for some family bonding and creative fun. Local to Upland, CA? Well, we have an exciting event on Monday, October 30th at the Upland Recreation Center – the Stuffed Animal Costume Workshop. Get your creative juices flowing and join us to make this Halloween unforgettable! (Register here no later than 10/25/23).
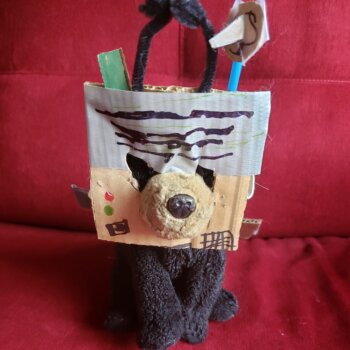
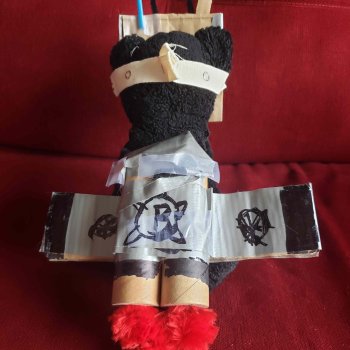
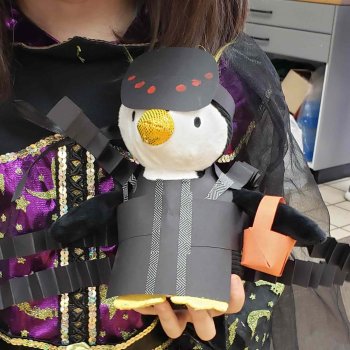
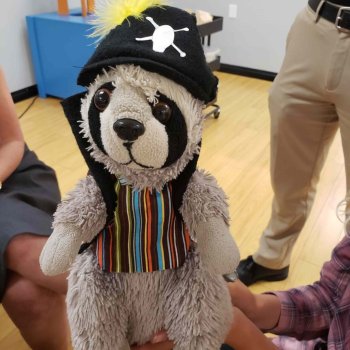
Stuffed Animal Costume Party
Some families make their Halloween costumes, some families buy them. In any case, it is a time of great creative energy. Set out fabric scraps, cardboard, and other supplies and let your whole family make costumes for loved stuffed friends.
Supplies:
- Thin (cereal box) and thick (corrugated) cardboard
- Felt and other fabric scraps
- Construction paper
- Cardboard Tubes
- Foil, stickers, decorative papers
- Ribbons, pom poms, pipe cleaners
- Clear Tape, Glue, Stapler
- Needle and thread (optional)
Tips:
- Brainstorm some costume ideas together. You don’t need to have a complete idea of how to accomplish your child’s vision. I bet they have any number of ideas. This is extremely low-stakes crafting. Your main role here is to make sure they only make a costume and not permanent changes to their favorite lovey.
- If you find yourself wanting to tell your child how to make what they are making, consider MAKING YOUR OWN project. That way you can talk about what you are doing leaving your child free to follow your example or go their own way.
- Stay with this project for as long as your child is interested. As simple as that. Don’t end it early and don’t make them sit there when they are done.
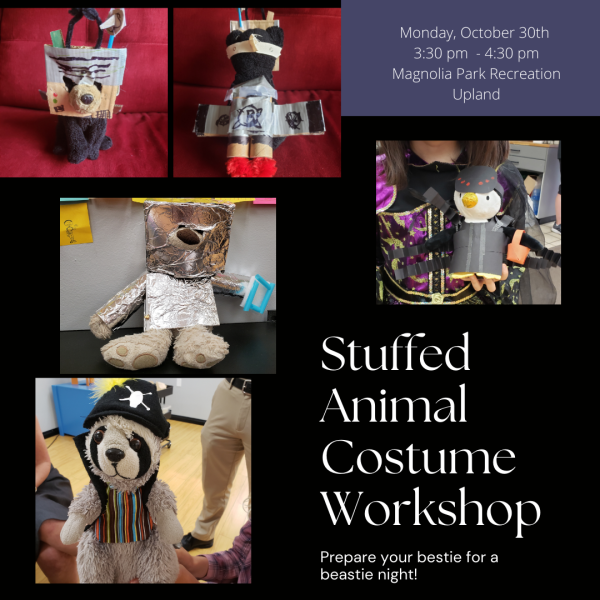
If you don’t want to go it alone, register for a TinkerSpace workshop. We have the supplies and the tools. You just bring your stuffed friend and your creativity. [Click to Register]
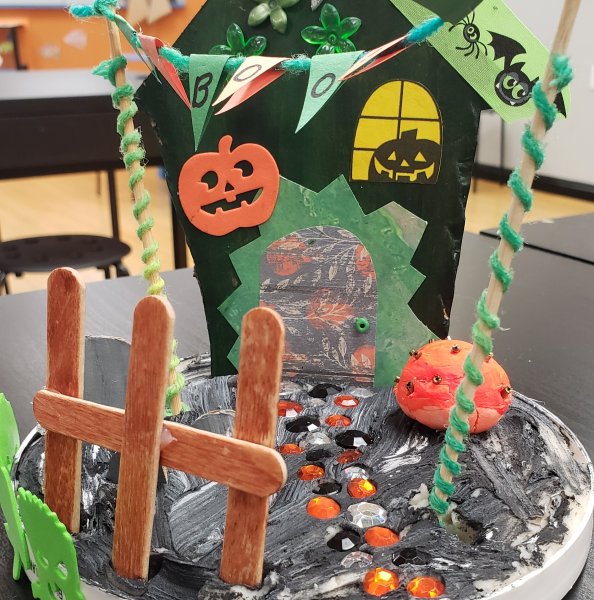
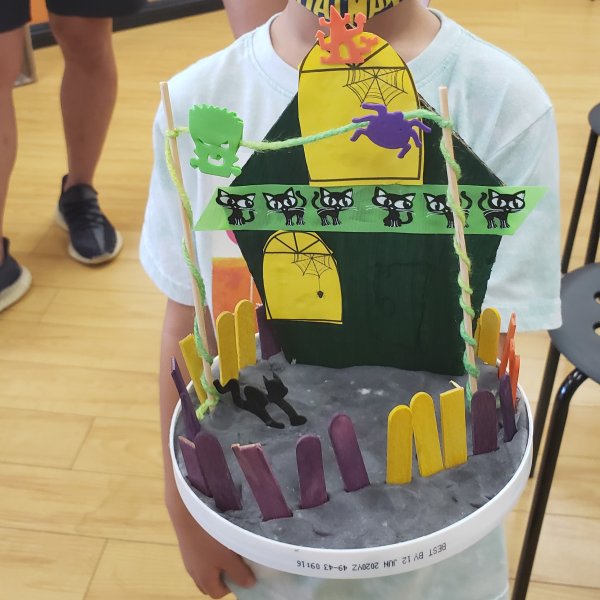
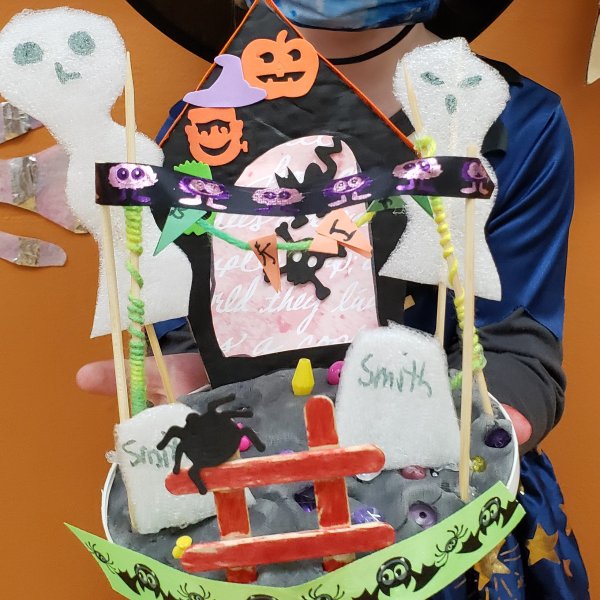

Spooky Worlds
- Corrugated Cardboard cut into a pentagon house shape.
- Paint (You can pre-paint the house (and base if you’re using a cardboard base)
- Black play dough, Crayola model magic, or other air-dry clay. Model magic can be colored black with a marker. You can mix black paint into the air dry clay.
- Colored papers, beads, craft sticks, and other craft supplies
- Halloween-themed cut-outs, ribbons, and foam pieces
- Cardboard tubes, egg carton pieces, thin cardboard, large plastic lid (ours are from large yogurt containers)
- Hot Glue
- Mod Podge (Optional)
Tips:
- You can either use a plastic base with play dough or air-dry clay pressed into it OR use painted cardboard as the base. If you don’t have a large yogurt container, you can use a shallow plastic or foil container). Play dough and most air-dry clays will crack as they dry. If this is more about the process and you are only planning on keeping it for a few days, that’s fine. If you want to keep it longer, paint over the surface with Mod Podge when you’re done decorating.
- The natural curve from strips of cardboard tubes makes them stand up nicely in either the clay or with hot glue on the cardboard surface. You can attach items to these strips rather than trying to get a flat item to stand up nicely. (See the tree and gravestones in the picture above.)
- If you find yourself wanting to tell your child how to make what they are making, consider MAKING YOUR OWN project. That way you can talk about what you are doing leaving your child free to follow your example or go their own way.
- Stay with this project for as long as your child is interested. As simple as that. Don’t end it early and don’t make them sit there when they are done.
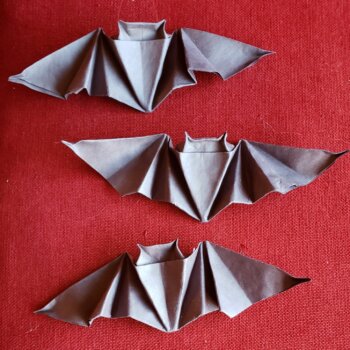
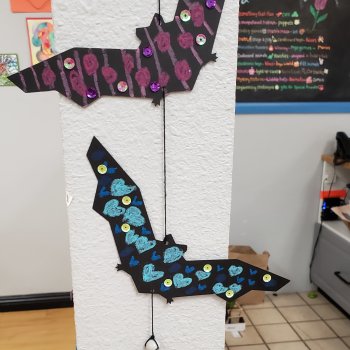
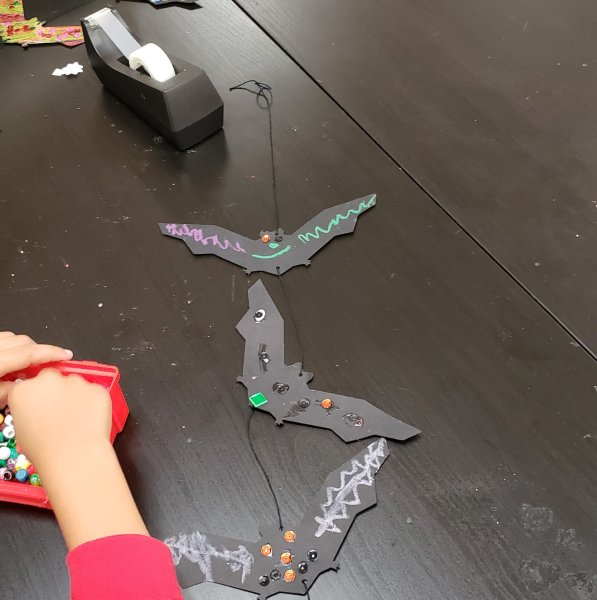
Hanging Bats – 2 Ways
Nothing says Halloween like a colony of bats decorating your house. Make leathery wet-paper fold bats that will last for years or colorful festive bats to hang for a season. Either way, your kids will love seeing their contributions to your spooky decor!
Wet Paper Fold Bat Supplies:
- Black construction paper square. (Cut these to different sizes for a variety of bats.)
- Spray bottle with water
- Fishing line or thin string and clear tape
2D Hanging Bat Supplies:
- Bats cut out of black cardstock (see tips below)
- Oil Pastels
- Thin String (I use crochet thread) and clear tape
- Small hole punch (optional
- Beads
Tips:
- Wet Paper Fold Bats – Watch the video above for step-by-step instructions to fold the bats. You’ll see in the video that, as the paper dries, you will need to keep tinkering with your detail folds. I usually fold one bat, set it aside, fold another, adjust the folds on the first bat, set both aside, make another bat, adjust the folds on the previous bats, etc.
- Wet Paper Fold Bats – When the bats are dry, use fishing line or a thin thread attached behind the head with clear tape to hang your bats from the ceiling.
- 2D Bats – You can draw your own template of a bat or do a quick internet search for “Bat Silhouette” or “Bat Line Drawing” to find one you want to use. You can print, cut it out, and trace it onto your cardstock (pencil shows up on black cardstock) or import the drawing into your cutting machine (Silhouette or Cricut) for ease of cutting.
- 2D Bats – Invite your kids to create by setting out the bats and oil pastels. You can decorate one or two ahead of time if you would like. Be sure to cover your table since oil pastels can be difficult to wipe off surfaces.
- 2D Bats – When you have a selection of bats to work with, punch a hole near the ear on one side and the foot of the other (you can, of course, hang them straight but this angle helps them look like they are flying). Run your string through several bats (maybe alternate the direction of their tilt), placing a piece of tape over the string on the back side of the bat to keep it in place. You will need to weigh down the end of the string (with beads or something else) in order to keep the string taut and have the last bat hanging as intended.
- If you find yourself wanting to tell your child how to make what they are making, consider MAKING YOUR OWN project. That way you can talk about what you are doing leaving your child free to follow your example or go their own way.
- Stay with this project for as long as your child is interested. As simple as that. Don’t end it early and don’t make them sit there when they are done.
Now that you’ve discovered these thrilling Halloween projects, don’t forget to mark your calendars for our Stuffed Animal Costume Workshop on Monday, October 30th, at the Upland Recreation Center. Let your kids express their creativity and make memories that will last a lifetime. Join us for a spook-tacular time and inspire your young ones to explore their artistic potential this Halloween season! Sign up now and get ready for a hauntingly good time