Like so many of you, my children are home working on computers to complete their schoolwork each day. I’m either incredibly mean or the most amazing mom ever (depends on who you ask on what day) but I also have a daily creativity requirement. Somedays we’re drawing, other days we’re learning how to create apps on App Inventor, but most days the kids are creating as they would at TinkerSpace. My daughter (11) had in mind that she wanted to learn how to embroider.
Graphite Transfer Technique
Before we look at embroidery, I want to share a technique that we use at TinkerSpace in so many different activities. You can always purchase transfer paper but at TinkerSpace we like to use what we have on hand. No transfer paper required!
 |
 |
|
| Step 1: Find the line drawing you wish to transfer. Google image searches are good for this. Use “line drawing” or “silhouette” in the search bar along with whatever you are looking for. Eg. “bunny line drawing.” Print it on regular printer paper. | Step 2: Use a pencil to rub graphite on the backside of the paper. Be sure to cover the area with the drawing completely. | |
 |
 |
|
| Step 3: Place the printout on the material to which you are transferring the image. [Picture up, graphite down on the material]. Trace over the image with a dull pencil. Be careful not to move the image while you are tracing. Hold the paper in place while you peel it back to peek underneath, checking on the transfer. Go over any places that the transfer is light. | Step 4: [Optional] Go over your transferred image with a marker. |
Embroidered Line Drawings
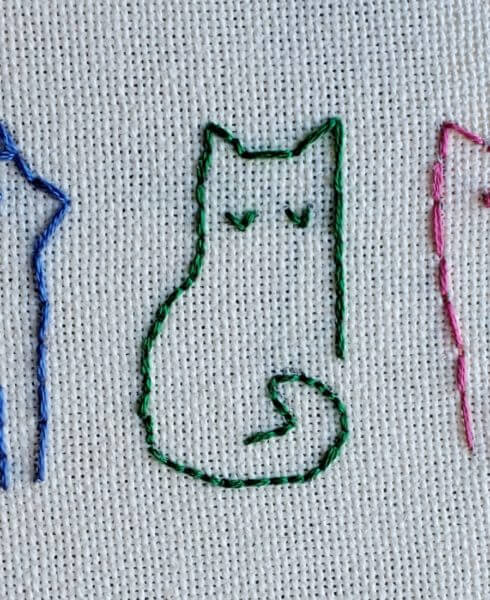
Once you’ve chosen your line drawing and transferred it to your fabric, you’re ready to start embroidering. Note: the blue fabric that I used for my first bunny was too dark to see the graphite very well. This is where the different colors of transfer paper would have come in handy. But, since I didn’t have that, I stacked the fabric over the printout and held them to a window (like using a lightbox) and then traced the bunny onto the fabric with a marker.
 |
 |
|---|
Embroidery Supplies
Embroidery DOES require specific tools. If you wish to purchase an item or two, here are some convenient links to Amazon products. Even if you don’t have the supplies to do this project, now that you know how to transfer a line drawing check out the gallery of activities below. You’ll have the supplies at home for at least one of them, I’m certain.
- 5-in embroidery hoop (5- inch is nice for a small starter piece but you may wish to get a set in different sizes [6 piece embroidery hoop set — 4-in to 10-in diameters] so that you have options at another time.)
- Embroidery Floss (if you have a child that has ever made friendship bracelets, you probably have some lying around. If you order this set, you will have plenty of embroidery floss in assorted colors that you can learn to make friendship bracelets.)
- Embroidery Needles (You need a needle with a large eye to get the multi-strand embroidery floss through)
- Linen Embroidery Fabric (This is not necessary. Any scrap of light-colored, non-stretchy fabric will work. It needs to be large enough to fit in the hoop securely. If you don’t have fabric lying around right now, raid your donation pile.
- If you like to have a complete set compiled for you, try an Embroidery Starter Set.
How to Embroider
Fortunately for my daughter (and for all of you), I have an amazingly talented sister who has posted a video on her website to get you started in embroidery. The video below is posted with permission from https://karensmonsters.com. Her page is full of whimsy and creative ideas. You can purchase her monsters or kits and she also has some wonderful tutorials. I am eager to try her homemade art matchbox activity.
Idle Hands
After lunch each day, our family sits down to listen to The Hobbit audiobook for a few chapters. It is so cozy to have something to do with your hands while listening to a great story.
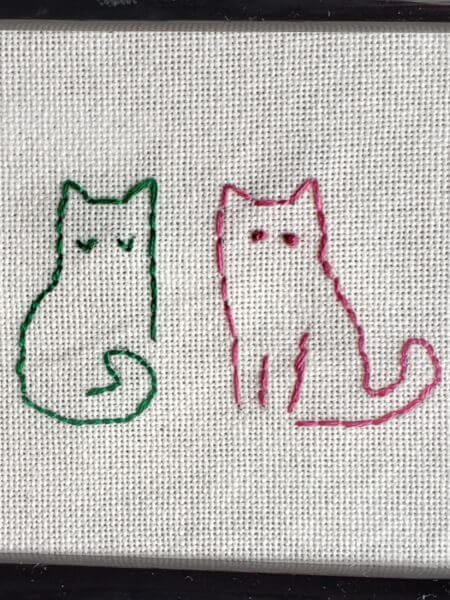
Our favorite types of activities involve learning a technique and then seeing where you can take it. Line drawing embroidery is fantastic for this. Learn a few stitches and techniques, transfer simple line drawings, and see where you can take it. Framed art, decorating doll items, add flair to dishtowels … the ideas go on and on. Of course, if you are 11 and you have a piece of fabric in front of you, it will probably end up as a pillow. Am I right, Moms?
More Ideas for Graphite Transfer
While we have never done embroidery with hoops at TinkerSpace, we have used the graphite transfer technique quite often. Here is a gallery of ideas for using this technique.

Line Drawing with stitched accents: Using the graphite transfer technique, we transferred this bunny outline to cardstock. We poked holes around the eyes and at the mouth/nose before filling the space with marker lines for texture. We then used crochet thread and a tapestry needs to sew in the eyes and mouth. This is a great project for younger hands since the needle does not need to be sharp. The cardstock is stiff enough to hold the tension of the stitches so no embroidery hoop is needed.
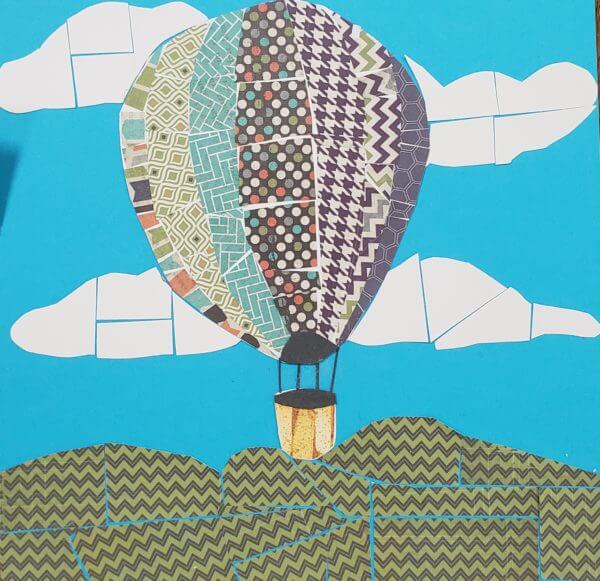
Online coloring pages are a great resource for landscapes. For this paper mosaic, we picked out portions of the drawing to transfer onto blue paper then cut pieces of patterned papers to fill in the spaces. This project was one piece of a 3-part project. We copied the same line drawing three times then completed it with paper mosaic, dots of paint, and colored pencil lines.

Black glue and watercolor resist is a favorite at TinkerSpace. We do some version of it for almost every holiday because it is so accessible and yet great depth can be achieved. It’s a good project for preschoolers up through adults. First, add some paint to Elmer’s Glue. We have a bottle of Elmer’s glue with black paint in it that we use to draw broad strokes. For other colors, you can mix a small amount of paint and glue on a plastic tray (we like yogurt container lids). You can spread the glue with a toothpick for detail work or a paintbrush for broader strokes. Once the glue is dry (it dries clear and just the paint shows through), you can use watercolors to complete the painting. Since the glue resists the watercolors, the painted lines stay crisp.