
As we navigate being “safer at home” many people are turning to baking and crafts as they have more family time. Why not combine the two? Let’s all make some cardboard cakes. Entire cakes, slices of cake, cupcakes … there is no end to your cardboard confection possibilities.
Making the Cake Slice — A Math Lesson
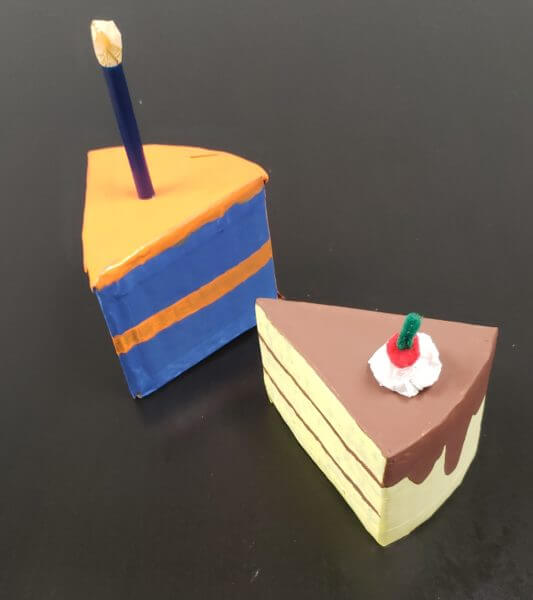
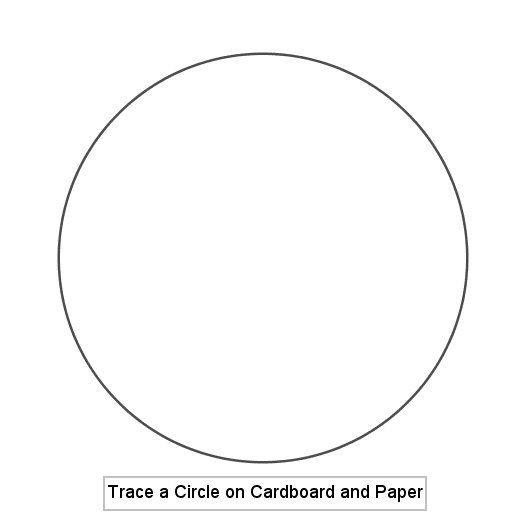
These slices of cake are made from cardboard taped together with masking tape. We chose masking tape since it is paintable (where duct tape is not). You can incorporate a math lesson here as follows: Trace a circle on a piece of cardboard and also on a piece of paper. Cut them both out. Fold the paper circle in half and in half again to find the center. Mark the center on the Cardboard Circle.

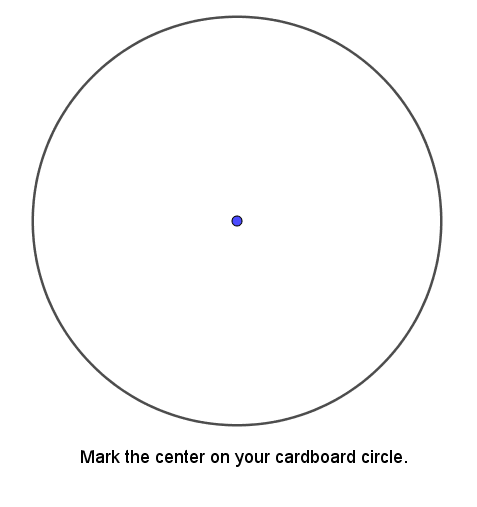
At this point, you are done with the paper circle but you may wish to save it to help with the cake decorating portion of the craft.
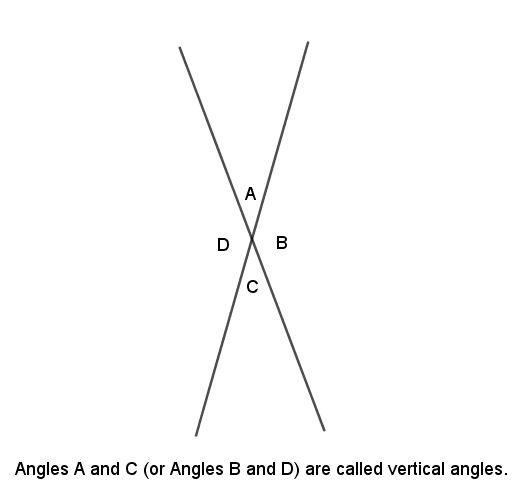
Diameters, Vertical Angles, Sectors, and Congruent
Now draw two lines across your cardboard circle through the center point — these are diameters. Position these diameters so that they define the size slice of cake you are interested in making. When two lines cross they form 4 angles. The non-adjacent angles are called vertical angles and it is mathematically true that vertical angles are always the same size. Your two lines have divided the circle into 4 pieces — called sectors. The sectors formed from vertical angles are congruent (meaning they are the same shape and size).
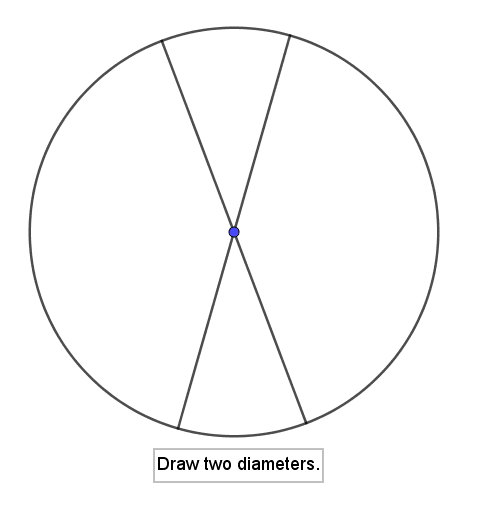

Cut along your diameters and you will have two wedges of cardboard to form the top and bottom of your slice.
Or the Quick and Dirty Way
Cut out a cake-like wedge from a piece of cardboard. Then place your wedge on a second piece of cardboard, trace and cut out. If you are only making a single slice, this is definitely the faster way. We won’t force you to do math. If you want to make slices that fit together to form a whole cake, we recommend using the above method.
Making Cardboard Bend
Now for the sides! Here’s a trick to get cardboard to bend smoothly … Notice that a piece of corrugated cardboard has two sides (flat cardboard) and the bumpy center. Cut a strip of cardboard (3 – 4 inches wide) such that when you look at the long edge of the strip (not the 3-inch side) you see corrugation bumps.
YES —–> 
NO ——-> 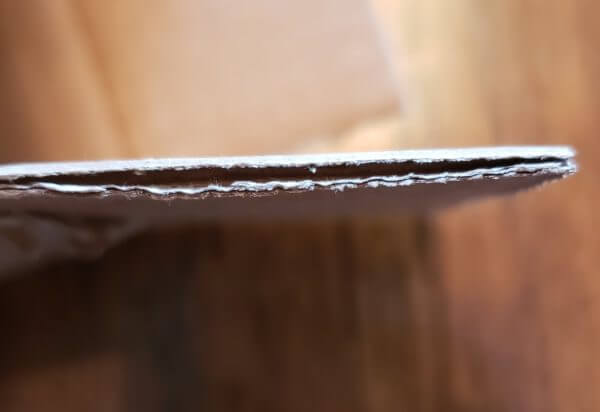
Peel off one side of the cardboard, leaving the other side and the corrugation bumps in place. You will see that the piece of cardboard is now flexible and can be attached to the curved surface of your cake slice.
Putting it Together
Tape the edge of your strip to one of your cardboard wedges. Most likely you want the smooth side of the cardboard strip out, but it might be interesting to have the bumps out. That’s the wonderful thing about projects like this … you get the make all the decisions. Use masking tape. Work slowly to keep the tape smooth and unwrinkled. When you’ve made it completely around, trim the edge of your strip and tape it to the beginning. Tape the other wedge of cardboard to the bottom completing your piece of cake cardboard form.
We Want More Cake!
If you want to make an entire cake you could use your full cardboard circle to make the cake. Or make a square cake. You could make 6 – 8 slices and put them together to form a “sliceable” cake — just make sure all slices come from the same size circle and they will fit together, no matter the size you made the slice (More math here, but can you figure out why?). Or maybe you want to make cupcakes. Show us what you’ve made!
Time to Decorate
Now for the decorating! The cake wedges in the picture were painted using craft acrylic paint. [22-4806 Sargent Art Primary Acrylic Paint Set, 4 Ounce, 6-Pack will give you the 3 primary colors plus green, black, and white so you can mix any colors you would like — find as many educational opportunities possible; or Apple Barrel PROMOABI, Assorted Colors 1 (18 pack)
for premixed colors — you can still mix your own shades!]. You can also choose to decorate with paper. Use the paper circle you already cut out and use that to cut cardstock (Neenah Creative Collection Specialty Cardstock Starter Kit, 12″ x 12″, 65 lb, 18-Color Assortment, 72 Sheets (46408-02)
) or construction paper [SunWorks Construction Paper, 10 Assorted Colors, 9″ x 12″, 50 Sheets
] to size.
Once the cake no longer looks like cardboard … there’s cake and frosting … it’s time to add those decorations. What can you find around the house to decorate? Here are some ideas:
- yarn
- buttons
- beads
- raid those craft sets your kids have been given as gifts
- tissue paper
- straws
- sequins
- glitter
This is where your kids can really shine. Let them load up their cake with as many decorations as they would like (at least they’re not eating all that sugar!).
How Can You Get Supplies
While TinkerSpace is closed currently, we are putting together supply kits for those that need them. Click on the payment button below and then follow the link to our google form in order to schedule a pick-up time. [Note: please only click for payment if you live locally or just want to support us. We are not offering mail-order at this time.] Your kit will include cardboard wedges and strip, lengths of masking tape, paper for decorating (sorry, paint is not available), and some accessories (random). In the comments section of the google form, you are welcome to request colors and/or particular add-ons.